Rendering a part of a video or audio by using selected zones in Kdenlive
I utilize Kdenlive for crafting online course videos. As an open-source video editing software, Kdenlive offers a comprehensive suite of tools without any cost. Occasionally, I find myself needing to render specific segments of video or audio that are commonly featured across all my videos. This allows me to efficiently reuse content when necessary.
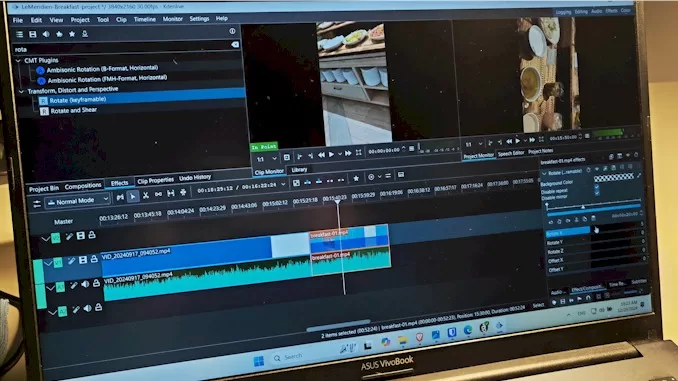
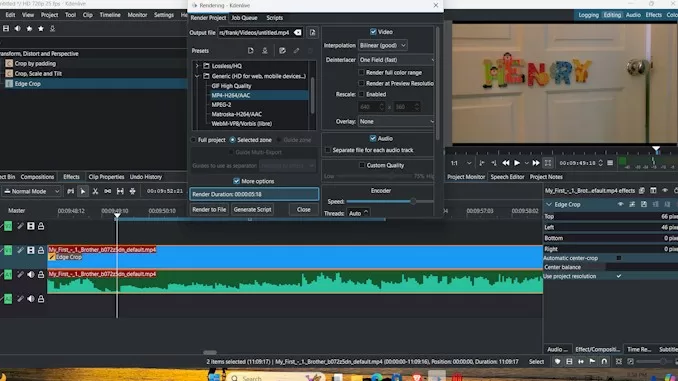
In the rendering configuration window, I spot an option that says selected zones beside the option whole project, and I thought that is what I need to render the common component of video or audio.
But the way it works is not what I think of. I selected the parts of video and audio and combine them into one group, while it shows being selected with orange color I begin to render it. The result is totally not the one I expected.
So, I began to search online and discovered that I had to approach it differently than I initially thought. I needed to set in and out points to define the specific segment I wanted to render.
Here is what I did to render a part of a video or audio in Kdenlive using selected zones:
Step 1: Open Your Project
- Launch Kdenlive and open your project by going to
Project > Open...and selecting your project file.
Step 2: Mark the Zone to Render
- Set the In Point:
- Move the playhead (the vertical line that shows your current position in the timeline) to the start of the segment you want to render.
- Press the
Ikey on your keyboard to set the in point (or right-click on the timeline and chooseSet zone start).
- Set the Out Point:
- Move the playhead to the end of the segment you want to render.
- Press the
Okey on your keyboard to set the out point (or right-click on the timeline and chooseSet zone end).
Step 3: Render the Selected Zone
- Go to
Project > Render...(or pressCtrl+Return). - In the Render dialog, ensure the “Selected zone” option is checked. This tells Kdenlive to render only the marked in and out points.
- Choose your desired output format and settings in the Render dialog. You can select presets or customize settings according to your needs.
- Choose the destination where you want to save the rendered file.
- Click the
Render to Filebutton to start the rendering process.
Step 4: Verify the Output
Once the rendering is complete, navigate to the destination folder you selected and check the output file to ensure that the segment has been rendered correctly.
To render a specific segment of a video, you need to set in and out points by pressing the “I” and “O” keys on your keyboard. This method allows you to precisely define the clip, helping you gather various elements to create high-quality video content.