How do I trim a video without rendering it
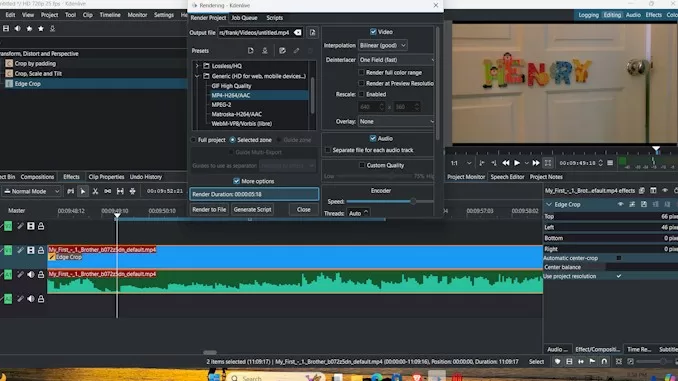
At times, I rely on OBS to capture my computer screen for creating videos intended for my website. It does the job well enough, providing videos of decent quality, which fits my requirements. However, before I can share them on the website, I must trim the beginnings and endings of the videos where I’ve clicked the record button in OBS. To achieve this, I turn to a video editing tool such as Kdenlive. Yet, I find this process quite challenging because each time I make a tweak to the video clip, I’m obliged to render it anew into a video file.
This becomes quite time-consuming, especially when dealing with lengthy videos, and it’s frustrating to see the file size doubling in the process. I don’t understand why this is needed because I only do some simple edits to the video, like trimming or cropping. I don’t add any effects or change the footage in any way.
I understand I need to come up with a solution for this, or else I’ll end up investing a significant amount of time rendering each video.
Despite searching on Google for a solution, I couldn’t find the answer. I realize that I have to figure it out myself.
Thankfully, I’ve had experience using Movavi Screen Recorder before. When I made cuts or trims to the recorded video using Movavi, it swiftly exported the video into an MP4 file right away. Despite trying several methods found in my Google search without success, I eventually decided to give Movavi Screen Recorder a shot. And you know what? It delivered exactly what I needed!
Initially, I took the OBS screen recording video file, which had the MKV extension, and placed it within the default folder of Movavi Screen Recorder. Specifically, it’s located in the “Video” section under the folder labeled with your name within the Windows system.
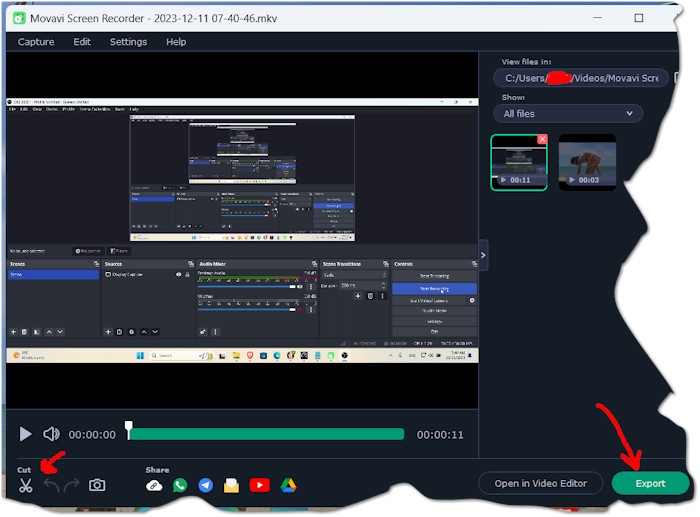
Next, I captured a brief screen video using Movavi Screen Recorder. Following that, you’ll reach a window where you can edit the video you’ve just recorded. In this window, you’ll be able to select the video created in OBS from the options under ‘View files in:’, as shown in the screenshot below:

Once you’ve loaded the video, you can easily make cuts or trims right here. Once you’re done editing, simply click the Export button. Within seconds, you’ll have an MP4 video file that includes your edits.
Not only will you swiftly obtain your desired video, but you’ll also be pleased to notice that the video’s size remains almost the same as the original, unlike when it gets larger after being rendered in Kdenlive.


